Friday, December 24, 2010

Emboss Resist - December Technique class

Somehow I missed sharing this before my class last weekend, so I'll share now. I have noticed (and I'm sure you have too) that the daily themes aren't working for me right now. I have cards I've made, but they don't fit a theme, so I don't share them. So for now, if I have something that goes with a theme I'll post it, but otherwise, I'll go back to sharing whatever I've been working on. With that said here is my card for today:


In one of my past technique classes (Heat Embossing), I did quickly share the Emboss Resist technique. I've had a few requests to go over it again, so December's class was all about Emboss Resist. We used watercolours, Stampin' Pastels, and classic inks with Sponge Daubers and Stampin' Sponges. The technique is the same no matter what medium you use:

1. Stamp an image with VersaMark ink and sprinkle with Stampin' Emboss powder (I usually use Clear).
2. Heat with a Heat Tool.
3. Apply ink (or pastels) over the area you embossed.

That's it! The embossed areas will resist the colour and show whatver is underneath. For this card, I stamped the swirl from Elements of Style onto a piece of Newsprint DSP. After heating the embossing powder I rubbed several ink colours randomly over the butterfly with my Sponge Daubers. The butterfly was cut with the Beautiful Butterflies die for the Big Shot.

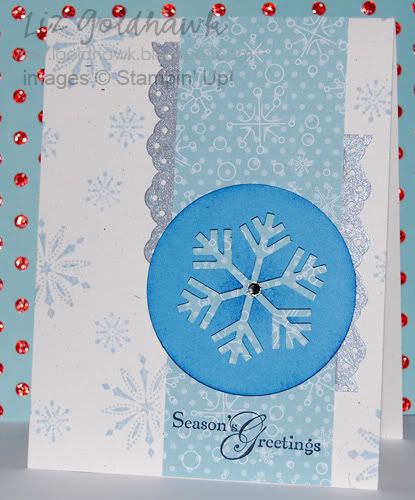
Stamps: Inspired by Nature, Curly Cute
Inks: Old Olive, Pumpkin Pie, Rose Red, Perfect Plum, VersaMark
Cardstock: Naturals White, Pear Pizazz, Perfect Plum, Rose Red
Big Shot: Elegant Lines textured impressions folder, Beautiful Butterflies die
Other: Corner Rounder punch, Dotted Scallop Ribbon punch, Newsprint DSP, Neutrals buttons, Linen thread.

Thursday, December 16, 2010

Try it Thursday - Letterpress plates

On Thursdays, I try something new, and invite you to try it too!


Stampin' Up! introduced Letterpress plates for the Big Shot in the Holiday Mini Catalogue, and I thought I'd get one to at least try it and see what I thought. You ink the raised portions of the plate with Craft ink (I used Real Red and Old Olive Stampin' Spots so I would get two colours). Then it goes through the Big Shot with paper (they recommend Watercolour paper, but I used Naturals White paper). My photo didn't capture the debossed effect very well, but it does look nice in person. My paper slid a little, and it's not perfect, so I inked the edges to disguise it a little...

Inks: Real Red & Old Olive Craft ink
Cardstock: Real Red, Naturals White, Pear Pizazz
Other: Old Olive 1/8" Taffeta Ribbon, Scallop Trim edge punch, Joyful Season letterpress plate, Holly Jolly DSP

Shannon West made a video for Stampin' Up! which includes some very good tips & tricks to be successful with the Letterpress plates: http://www.youtube.com/watch?v=BJpeQ7fL5mw

Monday, December 13, 2010

Mini Monday - Wintery Day of Gratitude


Day of Gratitude is in the Fall/Thanksgiving section of the Holiday Mini, but I think it can also be used for Christmas... the medallion image can be used as an ornament, or in this case as a snowflake-like image. This is one of the cards we'll be making at my Technique Class this weekend, and it shows a variation of the Emboss Resist technique. I added colour to the stamped & embossed image, then added more colour by rubbing it over the embossed image. I will have other sentiments available if you don't want to make this a Christmas card. Please contact me to register for this class if you'd like to make this card.

Stamps: Day of Gratitude, Christmas Greetings, Serene Snowflake
Inks: Whisper White (Craft), VersaMark, Baja Breeze, Marina Mist
Cardstock: Crumb Cake, Marina Mist, Whisper White, Very Vanilla
Other: Clear Stampin' Emboss Powder, Stampin' Sponge, Elegant Soiree DSP, Rhinestone brad

Wednesday, December 8, 2010

Whatever Wednesday - Snowy Scrapbook page


This is the scrapbook page we'll be making this Sunday at my December Scrapbook class... the pictures are from a few years ago, but I could have created this layouts from pictures I took this week too... we're experiencing huge snowfalls! My Big Shot got a workout on this layout... cutting out Timeless Type letters for the title, embossing some snowflakes (Northern Flurry Textured Impressions folder) and cutting some accent snowflakes (Northern Frost Decorative Strip) which I sponged with Champagne Mist shimmer paint. Serene Snowflakes was the perfect stamp set to use on this layout, and I also stamped part of my title with the Broadsheet Alphabet.

There is still time to sign up for this class - just $5.00 (or free with a $25.00 order). Please RSVP by Saturday, December 11th.
Stamps: Broadsheet Alphabet, Serene Snowflakes
Inks: Baja Breeze, Champagne Mist Shimmer Paint
Cardstock: Bashful Blue (textured), Baja Breeze, Very Vanilla
Big Shot: Northern Flurry T.I.F., Timeless Type Sizzlets, Northern Frost Decorative Strip
Other: Neutrals Prints DSP (I used the Very Vanilla Patterns

Sunday, December 5, 2010

Sketchy Sunday #102!

I have a quick & easy card sketch for you this week:


I wanted to try out my Holly & Jolly rub ons before the holiday season is over (I'm still working on my cards for this year). I have to admit, they were a little tricky to use, and I had to be very careful, and rub longer than I was expecting based on the rub-ons I've used in the past... I do like the way the card turned out though, and I hope you like it too!


If you would like to play along, please add a link to my comments so I can go and see what you've created!

Stamps: none!
Inks: none!
Cardstock: Naturals White, Crumb Cake, Riding Hood Red, Old Olive
Punches: Scallop Circle, 1 3/8" Circle, Decorative Label
Other: Paper Piercer & Mat Pack, Holly & Jolly rub-ons, Basic Rhinestones, Jolly Holiday DSP

Congratulations to Yvonne, Joyce and Kirsten!

I'm not sure where this week went... but I want to say congratulations to Yvonne and her two new downline members, Joyce and Kirsten. They took advantage of the 1/2 price Starter Kit while that promotion was running I'm hoping I'll get to meet them and stamp with them this month at my team meeting!

Monday, November 29, 2010

Congratulations to Pauline!

I would like to welcome Pauline to my Gold Stars, Ink. team. I just met Pauline this weekend, and it was so fun to help her create some cards. Pauline decided to go for the great deal on the Starter Kit so she could get everything she needed to start stamping. I'm looking forward to stamping with her again soon!

Sunday, November 28, 2010

Congratulations to Susan and Margaret!

I want to welcome Susan to the Gold Stars, Ink. team. She joined up as Margaret's downline with the fantastic Starter Kit special! There are just three days left to take advantage of this great deal yourself... let me know if you want more details!

Saturday, November 27, 2010

Congratulations to Adelina!

Congratulations to Adelina, the newest member of my Gold Stars, Ink. team! Adelina joined to get the great deal on all the products in the Starter Kit. There's just three more days to take advantage of this great deal! Click here if you'd like to learn more.

Friday, November 26, 2010

Fast & Fun Friday - Greenhouse Gala

Pretty Greenhouse Gala Designer Series Paper make this card fast & fun. It's my 3x3 thank-you card for my November orders. I cut the DSP to 2 3/4" x 2 3/4", stamped the sentiment (Three Leaves) with Pear Pizazz and punched it out with the 2" x 1 3/8" Oval punch and mounted it on some Peach parfait cardstock punched out with the Decorative Label punch and attached it to the card with Stampin' Dimensionals. I added a rhinestone to one of the leaves, and it's done. easy peasy!


Stamps: Three Leaves
Inks: Pear Pizazz
Cardstock: Baja Breeze, Whisper White, Peach Parfait
Other: 2"x1 3/8" Oval punch, Decorative Label punch, Greenhouse Gala DSP, Basic Rhinestone.

Monday, November 22, 2010

Mini Monday - Paisley Prints


The Online Spectacular started today, and goes until November 30th. You can save from 30-50% on selected products and product bundles, and 20-40% on select downloads for My Digital Studio. There is also free shipping on online orders over $200.00. You can check out all the deals in the online store by clicking HERE.


This card showcases a few items from the Holiday Mini - Candy Cane Christmas DSP, Paisley Prints stamp set, Seasonal Sentiments stamp set and the 2 1/2" Circle punch. I embossed the sentiment (Wild Wasabi Craft ink and Clear Stampin' Emboss powder) and the accent tree (White Stampin' Emboss powder).

Stamps: Seasonal Sentiment, Paisley Prints
Inks: VersaMark, Wild Wasabi Craft, Certainly Celery
Cardstock: Blushing Bride, Baja Breeze, Wild Wasabi, Whisper White
Other: White & Clear Stampin' Emboss powder, Candy Cane Christmas DSP, Petals-a-Plenty DSP, 2 1/2" Circle punch, Basic Rhinestones, Eyelet Border punch

Sunday, November 21, 2010

Sketchy Sunday - #101

I'm back this week with another card sketch to get your creative juices going:


Feel free to adapt the sketch to suit the products you have on hand, and the type of card you need. This is also the card sketch challenge for Stampin' Connection tomorrow, so for any demo visitors, please play along there if you are inspired! I'd love to see what you make, so link me up!

The card I made for this sketch is one we'll be making at my Holiday Card Stamp-a-Stack ($25.00 for 12 cards - register by December 1st, and make two bonus projects for free!). Contact me for more info or to register.


Stamps: Snow Swirled
Inks: StazOn Jet Black, Marina Mist, Bashful Blue
Cardstock: Marina Mist, Naturals White, Brushed Silver
Other: 2 1/2" Circle Punch, Snowflake Punch, Eyelet Border punch, Candy Cane Christmas DSP


Congratulations to Lisa & Margaret!!!

Congratulations to Lisa for joining my team of Demonstrators as Margaret's first downline! I'm very excited for you both! Lisa took advantage of the Simply Amazing Deal on the Starter Kit (and you can too... check out here for more details). Just nine days left!

I'll be back later with my Sketchy Sunday post, and there is a Spectacular Online sale starting tomorrow, so I'll be back with details on that tomorrow too... for now, I have these little tidbits:

  • My Digital Studio - 50% off!
  • Designer Fabric - 50% off!
  • Free shipping on online orders over $200.00! If you don't have an order that large, have a virtual party with some friends who want to shop too... combine your orders, and get hostess benefits too!
If you want to check the sale out yourself, be sure to check my website starting tomorrow.

Thursday, November 18, 2010

Try it Thursday - Embossed Ribbon

On Thursdays, I try something new, and invite you to try it too!


This is the second card we're making at my Technique Class this weekend. We're embossing the ribbon with the Big Shot and a Textured Impressions Folder (which didn't photograph well, unfortunately). I still have spots in the Sunday classes, so let me know if you'd like to come over and try this technique too!

Stamps: Contempo Christmas
Inks: Cherry Cobbler, Early Expresso
Cardstock: Very Vanilla, Naturals White, Old Olive
Other: Ornament Punch, Very Vanilla Satin Ribbon, Square Lattice Big Shot die, Holly Jolly DSP

Wednesday, November 17, 2010

Whatever Wednesday - Ribbon Weaving

On Whatever Wednesdays, I share whatever is inspiring me, and hope you'll be inspired as well.

Before I get into my card, I want to welcome Sarah to my Gold Stars, Ink. Team... she took advantage of the Simply Amazing Opportunity to get the Stampin' Up! Starter Kit at half price! From now until November 30th, you can join and get this great deal too. You'll save over 70% on the products in these kits - you can choose either the Standard Kit or the Digital Kit. For more information about this promotion and joining my team, please go to my Join my Team page here on my blog.


I was inspired to try this ribbon detail with the Scallop Trim Border punch and Taffeta ribbon after seeing a video online... I can't seem to find it to link up right now, so if it's your video, please let me know and I'll add a link.

We'll be making this card at my Technique Class this weekend (Fun with Ribbon), and there are a few spots left, so if you'd like to come and make it please let me know!

Stamps: Fabulous Phrases, Morning Cup, Fine Flourish
Inks: Always Artichoke, Pretty in Pink, Blushing Bride, Sahara Sand
Cardstock: Sahara Sand, Very Vanilla, Always Artichoke, Pink Pirouette
Other: Candy Cane Christmas DSP, Scallop Trim border punch, Pretty in Pink Taffeta ribbon, Blender Pen

Sunday, November 14, 2010

Sketchy Sunday #100!

On Sketchy Sundays, I have a card or layout sketch to hopefully inspire you. I also have a project I've done inspired by the sketch.

Sketch #100 is a card sketch. I shared it this week for the card sketch challenge on Stampin' Connection. If you play along, I'd love to see what you create... link me up in the comments!


Here's the card I created for this sketch... the blocks in the sketch can be interpreted as any shape you'd like.

I inked the butterflies with VersaMark, then a Classic ink, then rock n rolled in another Classic ink. I then stamped, embossed with Clear Stampin' Emboss powder. Then I rubbed a third Classic ink on with a Sponge Dauber.

Stamps: Butterfly Prints
Inks: VersaMark, So Saffron, Baja Breeze, Certainly Celery, Tempting Turquoise, Rich Razzleberry, Pretty in Pink, Melon Mambo, Pumpkin Pie
Cardstock: Pear Pizazz, Melon Mambo, Whisper White, So Saffron
Other: Clear Stampin' Emboss powder, Basic Rhinestones, Brights DSP, Butterfly Punch, Decorative Label Punch, Dotted Scallop Ribbon border punch, Sponge Daubers

Friday, November 12, 2010

Fast & Fun Friday - Snowy Dasher

On Fridays, I share something quick & easy to make (under 15 minutes).


This card is so quick and easy, I feel like it's almost cheating! You could easily make lots of these to send out to friends and family... I used the Note Cards (3.5x5" cards that are pre-cut and pre-scored), Candy Cane Lane DSP which I tore, then ran my Two-Way glue pen along the edge of the paper and sprinkled Dazzling Diamonds Glitter on. I stamped Dasher with Soft Suede, my greeting (from Christmas Greetings) with Cherry Cobbler, added some more glitter to Dasher's antlers, and glued my snowflake paper on. I think it may have taken 3 minutes...

Stamps: Christmas Greetings, Dasher
Inks: Cherry Cobbler, Soft Suede,
Other: Whisper White Note Cards, Candy Cane Christmas DSP, Dazzling Diamonds Glitter, Two-Way Glue pen

Monday, November 8, 2010

Mini Monday - Tags til Christmas

In my Mini Monday posts, I feature a stamp set (or two) and products from the current Mini Catalogue.


This card was created by Sherri, one of my Gold Stars, Ink. team members for our Shoebox Swap at our last meeting. It features several products from the Holiday Mini, so it's perfect for today's post. I love how Sherri layered the stamped and punched elements over the patterned paper from Deck the Halls and the texture of the Petals-a-Plenty Textured Impressions Folder. We used the Tags til Christmas stamp set from the Holiday Mini, The Decorative Label punch, Deck the Halls DSP and a Glimmer Brad as our embellishment. Thanks so much for sharing this great card with us, Sherri!

This card also showcases one of the Holiday Bundles Stampin' Up! has put together for the holidays... You can choose either the Ornament Punch or the Decorative Label punch with the Tags til Christmas stamp set and save 20%! You can see all the bundles in my online store by clicking HERE.

Stamps: Tags til Christmas, Teeny Tiny Wishes
Inks: Cherry Cobbler, Always Artichoke
Cardstock: Always Artichoke, Cherry Cobbler, Whisper White,
Punches: Ornament, Decorative Label, Lg Oval, Word Window, Scallop Trim border
Other: Glimmer Brad, Deck the Halls DSP, Petals-a-Plenty Textured Impressions Folder

Sunday, November 7, 2010

Sketchy Sunday #99!

On Sketchy Sundays, I have a card or layout sketch to hopefully inspire you. I also have a project I've done inspired by the sketch.


I can't believe I'll be posting sketch #100 soon... I've got a 12x12 scrapbook sketch for your creative enjoyment today:

and my layout... this is the layout we'll be making in my Scrapbook Class next Sunday (the 14th). Let me know if you'd like to come and make one too... you're always welcome to tweak it to suit your photos.

If you create something based on this sketch, I'd love to see... please link me up in the comments!

Stamps: Just Perfect Alphabet, Schoolbook Serif Alphabet
Inks: Old Olive, Pacific Point
Cardstock: Real Red, Bashful Blue
Other: Celebrations DSP & Quick Accents, Stampin' Write journaling pen

Wednesday, November 3, 2010

Whatever Wednesday - Just Believe Glittered

On Whatever Wednesdays, I share whatever is inspiring me, and hope you'll be inspired as well.


This card is inspired by my downline... I knew I wanted to feature Just Believe and do four Technique Rewinds (from past technique classes) at our team meeting and I asked for some ideas. Margaret asked about the Heat & Stick powder and glitter, which works perfectly with the silhouette images in Just Believe. The colour combination (Daffodil Delight, Regal Rose & Early Expresso) was inspired by the Colour Coach.

I like using Heat & Stick powder with glitter because it seals it in so it doesn't rub off the card. Plus, it's easy to use!

Stamp your image with VersaMark ink.
Sprinkle with Heat & Stick powder until it looks shiny.
Sprinkle with Glitter of your choice.
Heat again quickly to seal the glitter in.

Stamps: Just Believe
Inks: VersaMark, Regal Rose
Cardstock: Crumb Cake, Daffodil Delight, Whisper White, Pretty in Pink, Early Expresso
Punches: Extra Large Flower, 1 3/8" Circle, Word Window, Modern Label, Corner Rounder
Other: Greenhouse Gala DSP,  Basic Pearls, Perfect Polka Dots TIF, Heat & Stick Powder, Fine Supernova Glitter

Monday, November 1, 2010

Mini Monday - Day of Gratitude

In my Mini Monday posts, I feature a stamp set (or two) from the current Mini Catalogue.


Today I used the Day of Gratitude stamp set from the Holiday Mini. It's in the Fall/Thanksgiving section, but it really is much more versatile... hopefully I show that with this card. The design for this card came from a sketch challenge by Amanda on Stampin' Connections. I stamped the Rich Razzleberry background piece (tone on tone) with one of the smaller stamps, and the emboss resist for the medallion was inspired by Michelle Zindorf.
I inked the stamp with Versamark, then inked the whole thing with Daffodil Delight. Then I inked the edges with Rich Razzleberry, and stamped it onto my cardstock. I heat embossed with Clear Stampin' Emboss powder, and rubbed on Rich Razzleberry (centre), Pumpkin Pie (middle section) and Peach Pizazz (outside edge) with a Stampin' Sponge before cutting it out.

Stamps: Day of Gratitude
Inks: VersaMark, Daffodil Delight, Peach Parfait, Pumpkin Pie, Rich Razzleberry
Cardstock: Crumb Cake, Peach Parfait, Very Vanilla, Rich Razzleberry
Other: Clear Stampin' Emboss powder, White Stampin' Emboss powder, Early Expresso 1/8" Taffeta Ribbon, Dotted Scallop Border punch

Saturday, October 30, 2010

Step it up Saturday - Delightful Decorations

On Step it Up Saturdays, I show you two cards. One is a simple and quick and the second is 'stepped up' by adding a technique, embellishments or layers.

This week, I have two versions of a card using Delightful Decoration and Candy Cane Christmas DSP. This first card is very quick and easy.


I stamped the pink ornament on the Whisper White note card, then covered it with a mask and stamped the red ornament. I punched a little hole at the top of each ornament, and drew a line with my Stampin' Write marker, I added a strip of paper down each side and a Basic Rhinestone to each ornament. I stamped the sentiment from Christmas Greetings and the card is done!


The second card is stepped up with a little more stamping, the Ornament Punch, some Hemp Thread and  Whisper White Taffeta Ribbon. I also added a couple layers. I punched an ornament from the glittery striped paper from Candy Cane Christmas and stamped the Crumb Cake card base with the small stamps in Delightful Decorations. The sentiment is from Curly Cute.

Card 1 Supplies
Stamps: Delightful Decorations, Christmas Greetings
Inks: Blushing Bride, Cherry Cobbler
Card: Whisper White Note Card
Other: Basic Rhinestones, Basic Black Stampin' Write Marker, Candy Cane Christmas DSP

Card 2 Supplies
Stamps: Delightful Decorations, Curly Cute
Inks: Garden Green
Cardstock: Crumb Cake, Naturals White
Other: Ornament Punch,  Basic Rhinestone, Candy Cane Christmas DSP, Hemp Twine, Whisper White Taffeta Ribbon

Friday, October 29, 2010

Fast & Fun Friday - Shoebox Swap Just Believe

On Fridays, I share something quick & easy to make (under 15 minutes).

This is my swap card for my team meeting tomorrow... we try to keep each card to 10 minutes, so it's perfect for today's blog post too! I'm showing four cards using Just Believe and different techniques, so this card shows Ghosting (aka VersaMark Resist). The design is based on last week's Clean & Simple sketch (#113).


A Stamp-a-ma-Jig and Heat Tool were essential to keeping this card quick. You need to make sure your VersaMark ink is dry before applying the ink to the Glossy Cardstock. I used a Brayer, but you can also sponge it on.

Stamps: Just Believe
Inks: VersaMark, Certainly Celery, Marina Mist
Cardstock: Naturals White, Marina Mist, Glossy White
Other: Stamp-a-ma-Jig, Heat Tool, Paper Flowers, Basic Crystals

Wednesday, October 27, 2010

Whatever Wednesday - Just Believe

On Whatever Wednesdays, I share whatever is inspiring me, and hope you'll be inspired as well.


This week, I'm inspired by my favourite new stamp set from the 2010/2011 Idea Book & Catalogue: Just Believe. I'm creating four different cards all using this stamp set and showcasing four different techniques as well for my Gold Stars, Ink. meeting this weekend. The technique on this card is what I call Faux Watercolouring... I coloured the rubber on the stamp with Stampin' Write markers and then misted it with water before stamping onto Naturals White cardstock. The rest of the card is pretty basic... just a few punched strips of cardstock and a little paper tearing. If you're interested in learning more about the Stampin' Up! opportunity (even if it's just for the discount), you're welcome to come to my meeting this Saturday and make cards with us.

Stamps: Just Believe
Inks: Rich Razzleberry, Pear Pizazz
Cardstock: Crumb Cake, Naturals White, Rich Razzleberry, Pear Pizazz, Tempting Turquoise
Stampin' Write Markers: Pear Pizazz, Rich Razzleberry, Garden Green, Pretty in Pink
Other: Dotted Scallop Ribbon punch

Monday, October 25, 2010

Mini Monday - Christmas Collage

In my Mini Monday posts, I feature a stamp set (or two) from the current Mini Catalogue.


This card was inspired by a card sketch challenge by Susie on Stampin' Connection. I used Christmas Collage from the Holiday Mini (inked it all over with Crumb Cake ink, then used Stampin' Spots to add colour to some areas) and added the sentiment from Cardinal Christmas. I also used the new Glass Glitter from the Holiday Mini and some Hemp Twine to embellish the punched strip of Garden Green cardstock.

Stamps: Christmas Collage, Cardinal Christmas
Inks: Crumb Cake, Riding Hood Red, Cherry Cobbler, Always Artichoke, Garden Green
Cardstock: Naturals Ivory, Cherry Cobbler, Garden Green, Very Vanilla
Other: Hemp Twine, Scallop Edge punch, Fancy Favour die (from the scraps at the top edge), Silver Glass Glitter

Friday, October 22, 2010

Fast & Fun Friday - October Thank You cards

On Fridays, I share something quick & easy to make (under 15 minutes).


This is the 3x3 Thank You card I'm putting in with my October orders... very quick & easy, but I love the way this one turned out! I'm so glad I decided to get French Foliage, because I think it might be my favourite set from the Holiday Mini. I just stamped some images randomly onto the Crumb Cake card base and stuck on a scrap of Old Olive cardstock. I Rock 'n Rolled the focal leaf image (inked with Daffodil Delight & rolled the edges in Pumpkin Pie), and stamped it onto Naturals White cardstock before punching it out with the Decorative Label punch (another favourite item). I added the Thank You sentiment from Days of Gratitude and used Stampin' Dimensionals to attach it to the card. This may even be under ten minutes to finish!

Stamps: French Foliage, Days of Gratitude
Inks: Sahara Sand, Crumb Cake, Peach Parfait, Daffodil Delight, Pumpkin Pie, Poppy Parade, Old Olive
Cardstock: Crumb Cake, Naturals White, Old Olive
Other: Decorative Label Punch

Wednesday, October 20, 2010

Whatever Wednesday - Butterfly Congrats

On Whatever Wednesdays, I share whatever is inspiring me, and hope you'll be inspired as well.


My apologies for the lack of postings this week. I had some scheduled, but didn't come and check to make sure they posted, and of course they didn't for some reason. I'm back on track today, and will re-schedule the other posts.

Today, I'm sharing a card that was inspired by a sketch created by Susie Nelson for a challenge on the Stampin' Connection website (a demonstrator only message board and gallery). I also challenged my downline to create a card using at least one new In Colour and neutrals this month, so I thought I should play along too! I kept it pretty simple, with butterflies stamped in three of this year's In Colours, a punched strip of cardstock, some ribbon and rhinestones. I love the sentiments in the Curly Cute stamp set, and this one fit perfectly on the card.

Stamps: Butterfly Prints, Curly Cute
Inks: Peach Parfait, Concord Crush, Blushing Bride
Cardstock: Naturals White, Peach Parfait
Other: Basic Rhinestones, Dotted Scallop Ribbon punch, Early Expresso 3/8" Taffeta Ribbon, Stamp-a-ma-Jig

Thursday, October 14, 2010

Try it Thursday - Cut it apart!

On Thursdays, I try something new, and invite you to try it too!

This is the second card we'll be making in my Technique Class this weekend. After I stamped and embossed the flower image from Inspired by Nature, I cut it apart. I sponged different colours (chosen with the Colour Coach) onto each piece, and put them back together on some Basic Black cardstock leaving a small space between each piece. It's a very simple 'technique' and you don't have to make a grid... this would look great cut into strips too, but I really like it because it gives me another way to use some of my favourite silhouette images. If you create something using this technique, I hope you'll share... I'd love to see it!
 
 
Stamps: Inspired by Nature
Inks: Always Artichoke, Perfect Plum, Soft Suede, Cajun Craze, VersaMark
Cardstock: Naturals White, Basic Black, Cajun Craze
Other: Black Stampin' Emboss powder, Paper Trimmer, Linen Thread, Stampin' Sponge, Regals Button, Eyelet Border punch

Tuesday, October 12, 2010

Two for One Tuesday - Word Play

On Tuesdays, I share two projects that are linked in some way... stamp set, design, colours, etc.

Today I'm sharing two cards that look very different, but they are connected in several ways. They both use Word Play for the sentiment, they both use the Designer Label punch, and both have a similar design. This first card is one we'll be making it in my Technique Class this month - let me know if you'd like to come and join us. It uses the Faux Tile or Grid technique and French Foliage stamp set.


On the second card, I used a much different colour pallette. I used several shades of blue and just a bit of Very Vanilla. I used my Big Shot to cut the cupcake, and added some Basic Rhinestones and Smooch Topcoat for some bling.


French Foliage Card:
Stamps: Word Play, French Foliage
Inks: Sahara Sand, Peach Parfait, Always Artichoke, Cajun Craze, Old Olive
Cardstock: Cajun Craze, Old Olive, Pear Pizazz, Naturals White, Pumpkin Pie
Other: Decorative Label Punch, Paper Piercer & Mat Pack, Always Artichoke Seam Binding, Bone Folder & Paper Trimmer, Wide Oval Punch

Wish Big Card:
Stamps: Woodgrain background, Word Play
Inks: Pacific Point, Tempting Turquoise
Cardstock: Pacific Point, Tempting Turquoise, Very Vanilla, Baja Breeze, Marina Mist
Other: Decorative Label punch, Illuminate Smooch topcoat, Basic Rhinestones, Big Bold Cupcake Sizzlets, Brights Patterns DSP (Pacific Point), Square Lattice TIF

Monday, October 11, 2010

Mini Monday - Season of Hugs

In my Mini Monday posts, I feature a stamp set (or two) from the current Mini Catalogue.


Happy Thanksgiving! To celebrate this day, I thought I'd put my Season of Hugs stamp set to work and create a Thanksgiving card. This set co-ordinates perfectly with Beary Best Friends from the main Idea Book & Catalogue to make cards for back to school, Thanksgiving, Halloween and Christmas. The basket and sentiment are from Season of Hugs. I coloured the images with my Stampin' Write Markers and a Blender Pen.

The design from this card came from a card sketch challenge on Stampin' Connection. Susie Nelson created a sketch which inspired this card.

We'll be creating a similar card (with a Halloween theme) at my Make, Take & Donate at the Crouch Library this Wednesday @ 4:00pm.

Sunday, October 10, 2010

Sketchy Sunday - #98!

On Sketchy Sundays, I have a card or layout sketch to hopefully inspire you. I also have a project I've done inspired by the sketch.

 I have a 12x12 scrapbook sketch for you today... I really like this one, and I hope you do too! If you create something based on this sketch, I'd love to see it! Link me up in the comments.


Here is the layout I created based on the sketch:


I added some stamping (French Foliage from the Holiday Mini) to the background cardstock, and some texture with my Big Shot and the Spiderweb Textured Impression Folder. The title was cut with my Big Shot and the Billboard Decorative Strip Die. I still have to add my journaling...

Stamps: French Foliage
Inks: Pumpkin Pie, Old Olive, Cajun Craze
Cardstock: Very Vanilla (textured), Crumb Cake, Soft Suede (textured), Early Expresso
Big Shot: Spiderweb Textured Impressions Folder, Clear Circle, Scallop Circle, Billboard Decorative Strip
Other: Brights Patterns DSP (Pumpkin Pie)

Saturday, October 9, 2010

Step it Up Saturday - Pendant Notes

On Step it Up Saturdays, I show you two cards. One is a simple and quick and the second is 'stepped up' by adding a technique, embellishments or layers.

This week, I thought I'd play with the Pendant Note Cards. This first card is a CASE of the card in the Idea Book & Catalogue (pg 171). I used the Old Olive word patterned paper from the Bold Brights Patterns pack behind the cut outs in the Pendant note card. I tied a bow with Linen Thread through an Old Olive button from the Brights button pack. The sentiment is stamped with Curly Cute and Early Expresso ink. This is a quick and easy card, and I really like the simplicity.


On the stepped up version of the card, I embossed the Pendant Note with the Elegant Lines textured impressions folder. I stamped on some Old Olive cardstock with Old Olive ink and the Just Believe stamp set. That was adhered behind the cut outs in the Pendant Note Card. I added some Basic Rhinestones and put a Glimmer Brad (from the Brights Glimmer Brad pack) through a Rich Razzleberry button from the Brights Button pack. The sentiment (also from Just Believe) is stamped on Naturals Ivory cardstock with Rich Razzleberry ink and punched out with the Modern Label punch. I really like the embossing on this one. Which one do you like best?

Tuesday, October 5, 2010

Two for One Tuesday - Leaf Lines

On Tuesdays, I share two projects that are linked in some way... stamp set, design, colours, etc.

Today I wanted to show you two different cards using the same stamp set: Leaf Lines. The first card is very clean and simple... a nice masculine card that you can make quickly.

I stamped the Crumb Cake card base with Cajun Craze and one of the stamps from the set to create a background. I stamped the main image onto Naturals White cardstock, and punched it out with the 2" x 1 3/8" Oval punch and layered it with the Decorative Label punch from the Holiday Mini. A strip of torn paper and some brads on the label punch finish the card off.


My second card uses the same stamps and punches, but it's not a quick & easy card. I've added some background stamps, some texture, a sentiment and heat embossing. I double embossed the images. I thought I had seen this somewhere online, but it didn't work quite the way I was thinking it would, so I think I got something wrong (I think I should have stamped the images with StazOn, coloured them and then heat embossed with clear powder). I decided to use them anyway, since they turned out pretty cool...

First I heat embossed the leaves with Gold Stampin' Emboss powder. I coloured the leaves with various inks and my Blender Pen. Then I used the VersaMarker to go over the images and I sprinkled Clear Stampin' Emboss poweder over them. When I heated the images again, the gold details melted into the colouring and clear embossing. It looks a bit milky in this photo, but it is clear in real life... but the gold is mixed with the clear embossing a little. It actually looks very cool, but I had thought I'd keep the gold detailed outlines after I heated it the second time. The reason I double embossed was so my coloured images would resist the background stamping I did with the Sanded and Wonderfully Worn background stamps. I added a few Basic Pearls to the corners of the larger stamped blocks and called the card done!

Wowza!!! Great Deals!

Stampin' Up! is having a Clearance Rack Blitz starting today and ending October 18th. You can save up to 80% on retired products (ribbons, ink pads, chipboard, cardstock, Designer Series Paper, embellishments, Big Shot Dies...). Supplies are very limited on some of these items, so don't miss out on the great deals! These are available online only, so check out the deals, register/log in and select me (Liz Goldhawk) as your demonstrator to get the preferred pricing.

Some of my favourites:

Simply Sent Kit - Everything you need to make 10 cards, and you'll have the inks and stamps for future cards.
Was $56.95, now just $20.89!
Pretties Kit - was $41.95, now only $14.89!

Mini Monday - Thanksgiving Wishes

In my Mini Monday posts, I feature a stamp set (or two) from the current Mini Catalogue


We received the Day of Gratitude stamp set at the Hamilton Regionals to use for our make & takes, and I thought it was perfect for a couple challenges I wanted to participate in. The leaves work perfectly with the colour challenge this week at Just Add Ink, and the images work perfectly scattered on the main panel of FTL #110 on the Clean & Simple blog.

I heat embossed the sentiment with Old Olive Craft ink and Clear Stampin' Emboss powder and then sponged over it lightly with Pumpkin Pie ink.

Stamps: Day of Gratitude, Seasonal Sentiments
Inks: Old Olive (Classic & Craft), Pumpkin Pie, Rose Red, Always Artichoke
Cardstock: Pumpkin Pie, Old Olive, Very Vanilla
Other: 2 1/2" Circle punch, Dotted Scallop Ribbon punch, Clear Stampin' Emboss powder
.

Sunday, October 3, 2010

Sketchy Sunday - #97

On Sketchy Sundays, I have a card or layout sketch to hopefully inspire you. I also have a project I've done inspired by the sketch.

Here's a card sketch for you to work with this week...


It's also the sketch for the challenge on Stampin' Connection for any SU! Demonstrators out there... we'd love to have you play along!

Here's the card I made based on this sketch:


Stamps: Cute by the Inch
Inks: Rich Razzleberry Craft
Cardstock: Naturals White, Rich Razzleberry (textured), Blushing Bride, Whisper White
Other: Clear Stampin' Emboss powder, Rich Razzleberry 1/8" Taffeta Ribbon, Decorative Label Punch, Curly Label punch, Elegant Soiree DSP

Friday, October 1, 2010

Fast & Fun Friday - Decor Frame

On Fridays, I share something quick & easy to make (under 15 minutes).


I found this very nice frame and thought it would be perfect to create a fun and easy decor project with Designer Series Papers and Decor Elements. Believe it or not, the hardest part of this project was getting the backs open to switch out the photos that were in it. I still plan on getting a few photos printed in Sepia to put into some of the spots, but I like it with the papers for now. The Decor Elements vinyl words go on so quickly and easily on the glass in the frames. Then I just cut various papers from the Elegant Soiree Designer Series paper to 4"x6" and popped them in where photos would normally go.

This would be super easy to change out the papers to make it a seasonal accent, or to work in another room with different colours.

Wednesday, September 29, 2010

Whatever Wednesday - Paradise


This week, I was inspired by a card sketch challenge on Stampin' Connection (A SU! Demonstrator message board & gallery) by Susie Nelson. This is also a one-layer card which I enjoy creating every once in a while.

I inked up my clear B block (just the edges) with Old Olive ink, then stamped it down one side of my Sahara Sand card base. I inked the leaves (from the Paradise stamp set) with VersaMark, then kissed with inked stamps from the Extreme Elements stamp set. I heat embossed the leaves with Clear Stampin' Emboss powder. A few Brights Brads in the empty corners finished off the stamped images. It's hard to see in this picture, but I scored three lines between the stamped leaves and my sentiment (from FYI).

Stamps: Paradise, FYI, Extreme Elements
Inks: Old Olive, Pear Pizazz, Tempting Turquoise
Cardstock: Sahara Sand
Other: Clear Stampin' Emboss powder, Brights Brads, Bone Folder, Paper Trimmer, B Acrylic Block

Monday, September 27, 2010

Hamilton Regionals were a blast!

I had a great time yesterday with some of my team members (thanks for a fun day Margaret, Nancy and Sherri!) at the Stampin' Up! Regionals in Hamilton. We saw some great presentations from Stampin' Up! staff and Shelli herself was there too. There were also six great Wow presentations... I had lots of 'aha' moments. There were lots of great swaps and samples for us to look at too... and a sneak peek at a stamp set from the upcoming (January 2011) Occasions Mini. You can actually get this stamp early, and for free! I can't show you the set itself, but I can show you some cards using this set. It's called Eat Chocolate, and it's perfect for cards to send to friends (my friends love chocolate, anyway).

If you purchase the Starter Kit from me by October 10th, this set can be all yours! Add this to the already fantastic deal on the Starter Kit, plus the free Greenhouse Garden tote and it's an even better deal! My September special makes it even sweeter... I'm giving everyone who joins my team by September 30th a free Colour Coach too! To get your Starter Kit, all you have to do is go here and click "Join Now" on the left hand side. My password is: gold star

Anyone in Canada can join my team... if you'd like to learn more about the benefits of begin a Stampin' Up! Demonstrator, you can check out info here or contact me with any questions you have.

This Eat Chocoate set is fun, and totally me... I can't wait to play with it, and I hope you like it too!

Friday, September 24, 2010

Fast & Fun Friday - Aviary Stamp-a-Stack card

On Fridays, I share something quick & easy to make (under 15 minutes).

Before I get on with Fast & Fun Friday, I want to welcome Mair to my Gold Stars, Ink. team! She took advantage of the great special this month (the free Greenhouse Garden Craft Tote) which is on top of the already fabulous discount you get on the Starter Kit products (44% less than you'd pay as a customer). If you're in Canada, and you'd like to get this tote, or you'd like more information please e-mail me, or check out the Join My Team tab at the top of my blog.


This card is one that we'll be making in my All Occasion Stamp-a-Stack coming up on World Card Making Day (October 2nd). Since we make 12 cards (three of each design) , they have to be quick & easy to stamp and put together. Yvonne came over and helped me design these stamp-a-stack cards, and I love the way they turned out!

Stamps: Aviary
Inks: Cherry Cobbler, Not Quite Navy
Cardstock: Crumb Cake, Old Olive, Cherry Cobbler, Not Quite Navy, Naturals White
Other: Square Lattice TIF, Basic Rhinestone, Corner Rounder Punch, Scallop Edge punch, Two-Step Bird punch

I'm off to Regionals in Hamilton with three of my downline bright and early tomorrow... I'm very excited and know I'll have a good time!

Thursday, September 23, 2010

Try it Thursday - Fancy Favor Luminary

On Thursdays, I try something new, and invite you to try it too!


I saw this idea (or something like it) somewhere online at least a year ago and I've finally tried it out. I ran some textured Rich Razzleberry cardstock through my Fancy Favour Big Shot die and then cut the top inch off the top. I cut the bottom section an inch from the bottom score lines too. Then I ran a piece of Vellum Cardstock (2 3/4" x 11") through the Elegant Bouquet Textured Impressions Folder twice (once at each end). I stuck Sticky Strip along the edges of the Rich Razzleberry pieces and stuck the Vellum Cardstock to the rest of the Fancy Favour box. I used my Bone Folder to score the Vellum Cardtock with the Fancy Favour pieces, and stuck it together like I normally would. I have a battery powered tealight to put inside my luminary.

This is one of the projects from my Home Decor Class this weekend... it helps pass the drying time required for a couple of the other projects.

Cardstock: Rich Razzleberry (textured), Vellum Cardstock
Big Shot: Fancy Favor die, Elegant Bouquet Textured Impressions folder
Other: Sticky Strip, Two-Way Glue